


How to Root Samsung galaxy Ace Plus GT-S7500 (Simple Procedure)
Install CWM 5.5.0.4, Root, BusyBox & Init.d

Samsung Galaxy Ace Plus (GT-S7500)
Disclaimer:
Requirements :
CWM Procedure:
Rooting + BusyBox Procedure:

Samsung Galaxy Ace Plus (GT-S7500)
Disclaimer:
- Make Sure you have GT-S7500 only and no other variant.
- Make Sure you are ready with all the stuffs mentioned above
- You are Doing all this at your own risk
- No developer will be responsible if you Brick your device
Requirements :
- Odin3 Flash Program Download From Here
- CWM Package Download From Here
- SuperSU Package Download From Here
- BusyBox.zip Download From Here
- Windows PC
- Samsung Drivers Installed (Get from Here If not installed)
- GT-S7500 only
CWM Procedure:
- Download all the things Mentioned Above
- Extract Odin3.zip
- Extract cwm-trebon.zip and place it inside Odin3 folder
- Copy UPDATE-SuperSU-vx.xx.zip and Busybox.zip to root of External SD of your Phone
- Now Open Odin3 v1.85.exe
- Check Auto Reboot, F. Reset Time & PDA only
- Uncheck everything that is not mentioned above
- Now Click on PDA and select cwm-trebon.tar.md5
- Boot your Phone in Download Mode by Pressing Volume Down Key + Home Key + Power Button together
- Now Press Volume Up to Continue
- Now the Phone is Ready to be connected to PC
- Connect your Phone to PC
- Odin3 will detect your Phone and The Box will turn yellow
- Now Recheck whether every thing mentioned above is done or not
- Now hit Start Button to begin Flashing
- After flashing is done the phone will reboot
- Now the CWM is installed
- Now follow Rooting Procedure
Rooting + BusyBox Procedure:
- Boot your Phone in CWM mode by Pressing Volume Up Key + Volume Down Key + Home Key + Power Button together
- Now in CWM navigate to Install Zip From SDcard using Volume Keys
- Now Select Choose Zip from SDcard by pressing Home Key
- Now select UPDATE-SuperSU-vx.xx.zip
- Select Yes to Install
- Now select BusyBox.zip
- Select Yes to Install
- After Install is done Reboot Your Phone
- Now you are Rooted with Init.d Support
Root HTC Desire C Method

For ROOTING ur Desire C u will need to download here : http://loadbalancing.modaco.com/down...-superboot.zip
First Unlock ur bootloader from HTC Dev site then
Extract the given package on your desktop
Now , IMPORTANT part power-off your Desire C and then boot it to boot-loader and connect it with ur PC using USB cable
Wait for few seconds , Now goto FASTBOOT option in your boot-loader using the volume buttons
Wait until it shows FASTBOOT USB
Then , RUN "install-superboot-windows" file provide in the package u downloaded
Now some process will happen and its DONE !!!
U HAVE SUCCESSFULLY ROOTED UR HTC DESIRE C !!

Or You Can Root Using This Tool Kit:
The toolkit provides the user (basically new users) to flash Recoveries and
Kernels (even ROMs which will be updated soon) to your DESIRE C.


#    The update v1.5 will also provide users with two new features that is ***unlocking bootloader***
(giving you the oem unlock code) and  ***rooting your device***

Desire C Toolk!t v1.0

# Flashing Custom Recoveries:-

     > ClockWorkMod Recovery 6.0.3.0 (TOUCH) by mehmehmen LINK HERE

     > ClockWorkMod Recovery Stable by mmmcfc LINK HERE

     > ClockWorkMod Recovery 5.5.0.4 (TOUCH) by munjeni LINK HERE

     > TWRP Recovery 2.5.0.0 by nikhil16242 LINK HERE

     > Your Own Recovery Whichever You Want (if you have any new one please
         tell me too)

# Flashing Custom Kernels

     > Prometheus Kernel  LINK HERE

     > Your Own Desired Kernel

Desire C Toolk!t v1.5

# Rooting your phone

     > Root your Desire C with just a click. Rooting process uses Superboot
to get root access and then provide permanent root to the users.
Android 4.4.2 For Htc Sensation z710e/XE/4g Flashing on S-ON (rooted)

For Guide How To Unlock, Root And Install Custom Recovery This is The Guide
Note:
This Method Will Only Work If You Have 4EXT Custom Recovery Installed With Smart Flasher Enabled
Steps:
- Go To 4EXT Recovery (Enable Smart flasher If Not Enabled)
- Do NOT use superwipes
- Wipe data, cache, and dalvik cache
** (if you are simply applying an update to this rom base this might not always be required)
*** ((but do not report bugs if you didn't full wipe)) - Flash ROM
- Flash GAPPS
- Reboot
- Now You have android 4.4 on Your Htc Sensation :-)
Downloads:
Rom: Here
Gapps: Here
How To Unlock & Root HTC Sensation,Sensation 4G,SensationXe and Install Custom Roms on S-on

Being a newcomer to the Sensation myself it took me some time to figure out how to get everything how I wanted it.
I can now flash custom roms without trouble.
1. Unlock your phone
Unlocking your phone is really easy, all you have to do is go to the HTC Dev website, select your device and follow the steps. (If your version of the HTC Sensation is not in the list you can select "All other Supported devices)
HTC has done a great job putting together guides for every device.
WARNING: This will factory reset your phone, so you will loose your applications, sms's...
After doing this you should have a folder on your C:\ drive called Android containing the following: adb.exe, AdbWinApi.dll, fastboot.exe, Unlock_code.bin
If you have this folder you can move to step 2. If however you do NOT have this folder Then download the Following Download kit and unlock boot loader through it Thanks to Hasoon2000 for making this kit
2. Flashing a recovery
We will be using 4EXT recovery for reasons I will later explain. To do the following steps you have to have your phone plugged in and have USB Debugging enabled. (Settings - Develop Option - USB debugging)
- Download 4EXT recovery (1.0.0.5!): Here
- Put the file (recovery.img) in C:\Android (or wherever your adb and fastboot are located)
- Shift right click in the white space on that folder
- Select "Open command window here"
- If you can boot into your phone, do the following
- Type in: adb
- Type in: adb devices (This will give you a list of devices attached to your computer, so if your phone is correctly attached it should show up.)
- Type in: adb reboot-bootloader
- If you cannot boot your phone, do the following
- Disconnect your phone from your pc
- Power off your phone
- Remove the battery
- Insert the battery back in
- Turn on your phone while holding BOTH the POWER ON and VOLUME DOWN button
- Connect your phone to your pc again
- If you can boot into your phone, do the following
- Your phone will (re)boot, wait until you see a white screen which says "FASTBOOT USB"
- Type in: fastboot flash recovery recovery.img
- Wait until the flashing is finished
- Type in: fastboot reboot
You have now flashed the 4EXT recovery, through which you later will be flashing custom Rom's.
The newest version (1.0.0.5 and up) of 4EXT has the ability to flash the "boot.img" for you, so you don't have to do it yourself after every new kernel and rom flash!
You do have to enable it thought, which I will explain in the next step.
The newest version (1.0.0.5 and up) of 4EXT has the ability to flash the "boot.img" for you, so you don't have to do it yourself after every new kernel and rom flash!
You do have to enable it thought, which I will explain in the next step.
3. Enable 4EXT smartflash
This step is extremely important, because we are not s-off and there is a problem with creating the "boot.img". T-Macgnolia explained it nicely:
There are 2 ways to enable smartflash, one is a temporary way inside the 4EXT recovery itself (only for first time!) and the second way is permanent, through the 4EXT application.
The permanent way can only be enabled if your phone has ROOT! It's impossible to do it when you are going to flash a ROM for the first time.
Once you have flashed your ROM you have to install the 4EXT application and enable smartflash through it, which is explained in Step 5.
This step is extremely important, because we are not s-off and there is a problem with creating the "boot.img". T-Macgnolia explained it nicely:
| When you use HTC Dev to unlock your bootloader it does unlock the Recovery, System, and Boot partitions to allow your device to write to those partitions and not just read those partitions. But there is a catch, if you want to flash a custom recovery you have to use ABD fastoot commands to flash it. When you flash as ROM in a .zip file via Recovery, it only flashes the System partition. You then have to open the .zip file and extract the boot.img and then use ADB fastboot commands to flash the boot.img to your boot partition. If you do not you will still have the boot.img of the ROM you was using before you flashed the New ROM. Now let me explain the boot.img a little so you know why it is so important. The boot.img does just what thee name implies, it is what boots the Android ROM on your device. Now let me explain this a little further, the Android OS runs on top of something called a Linux kernel. This means that your bootloader boots the Linux kernel and the hardware of the device. The Linux kernel then boots the Android OS. The kernel is also the connection between the hardware and the Android OS. So you see if the kernel is not compatible with the system that is on the system partition you will have troubles like Wifi not working or other I hardware reliant functions. So when you flash a new ROM and you are HTC Dev unlocked you will have to flash the boot.img for the ROM or you will more than likely have troubles. |
The permanent way can only be enabled if your phone has ROOT! It's impossible to do it when you are going to flash a ROM for the first time.
Once you have flashed your ROM you have to install the 4EXT application and enable smartflash through it, which is explained in Step 5.
3A. Enable 4EXT Temporary smartflash
Enabling this is as simple is getting into the recovery and enabling it as an option.
NOTE: You only need to do this right before flashing your first ROM, so you should skip this step and come back here when the guide tells you to.
Again, you only need to do this ONCE, once you have flashed your first custom ROM and enabled permanent smartflash, you don't need to this any more!
Enabling this is as simple is getting into the recovery and enabling it as an option.
NOTE: You only need to do this right before flashing your first ROM, so you should skip this step and come back here when the guide tells you to.
- Disable "Fast Boot" on your phone.
- Settings
- Power
- Untick "Fast boot"
- Turn off your phone
- Hold the Power AND Volume Down button until you see a white screen which says: "Fasboot".
- Navigate to "RECOVERY" and select it, you should now boot into the 4EXT recovery
- Select "Tools"
- Scroll Down and select "Enable 4EXT SmartFlash"
Again, you only need to do this ONCE, once you have flashed your first custom ROM and enabled permanent smartflash, you don't need to this any more!
4. Flashing Root
Flashing root is easy now you have 4EXT installed, I will explain in a few simple steps how to do it(Your phone doesnot need to be S-Off to do this you can also do this on S-On.
Flashing root is easy now you have 4EXT installed, I will explain in a few simple steps how to do it(Your phone doesnot need to be S-Off to do this you can also do this on S-On.
- Download the following zip: Here
- Put the zip on the root of your SD Card
- Reboot your phone into recovery (like we did in step 3)
- Turn off fastboot and turn off your phone
- Hold the Power AND Volume Down button until you see a white screen which says "FASTBOOT"
- Navigate to RECOVERY and select it
- Select "Install from sdcard"
- Select "choose zip from sdcard"
- Navigate to where you previously but the zips and select the root one (Android_Revolution_HD_Root_and_BusyBox)
- Let it install
- Reboot
cidnum: HTC__001
cidnum: HTC__E11
cidnum: HTC__203
cidnum: HTC__102
cidnum: HTC__405
cidnum: HTC__Y13
cidnum: HTC__A07
cidnum: HTC__304
cidnum: HTC__M27
cidnum: HTC__032
cidnum: HTC__016
cidnum: HTC__E11
cidnum: HTC__203
cidnum: HTC__102
cidnum: HTC__405
cidnum: HTC__Y13
cidnum: HTC__A07
cidnum: HTC__304
cidnum: HTC__M27
cidnum: HTC__032
cidnum: HTC__016
5.Enabling permanent smartflash(IMPORTANT MUST DO OTHER WISE YOU WILL RUN INTO PROBLEMS)!
Like I explained in Step 3 when you want to flash roms with S-ON you need to have smartflash enabled, and now we have a rooted phone you can enable permanent smartflash! Here's how.
Installing the 4EXT Recovery Updater
Now you have installed and updated the 4EXT Recovery Updater, next we'll be enabling permanent smartflash in the application.
There are 2 ways to do this;
5A. Enabling smartflash through updating recovery
5B. Enabling smartflash through the settings menu
You should now have permanent Smartflash, you no longer have to enable smartflash inside the recovery itself when you flash a new rom Go to this guide to know How to flash any custom rom on htc sensation (Rooted With S-on).
Like I explained in Step 3 when you want to flash roms with S-ON you need to have smartflash enabled, and now we have a rooted phone you can enable permanent smartflash! Here's how.
Installing the 4EXT Recovery Updater
- Go to the 4EXT website and download the free 4EXT Recovery Updater.
- You can also use the 4EXT Recovery Control application, which is available in the play store and has more features. (But isn't free)
- Put the .APK file on your SD card like we did before with the ROM zip
- Open your File Management application of choice (IO File Manager for example)
- Search for the .APK file you previously put on your SD card and click "Install"
- Open the 4EXT Recovery application
- Press "Online install | upgrade"
- The application should ask you to connect to 4EXT.Net servers to synchronise, press yes
- If you don't have the newest version of the 4EXT Recovery application the application will ask you to update, if not just continue
- If you updated the application it will close, so re-open it
Now you have installed and updated the 4EXT Recovery Updater, next we'll be enabling permanent smartflash in the application.
There are 2 ways to do this;
- The first way is to upgrade your recovery (which is highly recommended), go to Step 5A.
- The second way is through the settings menu, which will just enable smartflash, go to Step 5B.
5A. Enabling smartflash through updating recovery
- Open the 4EXT Recovery application
- Press "Online install | upgrade"
- The application should tell you your phone model (HTC Sensation /XE), if this is the case press "Yes" otherwise press "No"
- Now you will see a list of 4EXT recovery versions, simply press the top (should be in red) and press "Install"
- At the end of the installation the application should ask you: "Is your device S-ON? Answer yes if unsure.", press "Yes"
5B. Enabling smartflash through the settings menu
- Open the 4EXT Recovery application
- Press "Settings"
- Choose the tab "Recovery"
- Scroll down until you see; "S-ON: 4EXT SmartFlash, and tick the box next to it
You should now have permanent Smartflash, you no longer have to enable smartflash inside the recovery itself when you flash a new rom Go to this guide to know How to flash any custom rom on htc sensation (Rooted With S-on).
The Cyogenmod Installer Easily Install Cyogenmod on your Android Device
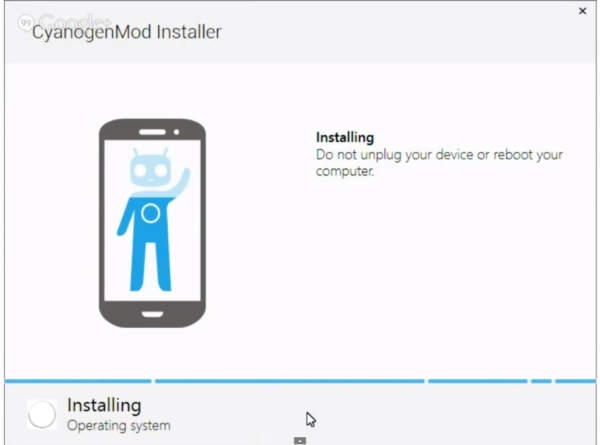
The CyanogenMod team has
now released their newest app - CyanogenMod Installer. This automates the
process needed to install the custom ROM on your Android device. You also need
software on your PC as well to get CM installed on your phone or tablet. the process is very easy but unfortunately Currently it is compatible with some of the android devices listed below in the link but good news is these guys constantly updating their list of compatible devices so watch for your device in the list and install Cyogenmod on your android device.
Supported Devices:
http://goo.gl/EL4hY7
CyanogenMod Installer Android App and PC software:
http://qbking77.com/?p=2706
CyanogenMod Inc. What the future holds:
http://goo.gl/fNLrEB
Transform your S4 into Note 3 with PhoeniX ROM V10.1 (Android 4.3 with Note 3 Features!)
Why waste money to buy Note 3 if u can transform your S4 and get the exact same features?
With so many ROMs out there, its refreshing to see something truly revolutionary.

I don't own this ROM. I've tried almost every ROM and this is the best ROM out there.

Based on the lastest stock firmware: Android 4.3 XXUEMK8 (build date: 21/11/2013)
With so many ROMs out there, its refreshing to see something truly revolutionary.
I don't own this ROM. I've tried almost every ROM and this is the best ROM out there.
I am not responsible for any damaged caused to your device while using this ROM
Based on the lastest stock firmware: Android 4.3 XXUEMK8 (build date: 21/11/2013)
Perseus 14.1 kernel - Thanks to AndreiLux his thread
Fully Deodexed
Added latest BusyBox
Added latest SuperSU+Bin files
Added Flashplayer support (Note: Flash doesn't work on stock browser, use dolphin or something.)
Updated all stock apps to their latest version(Gmail, Google search, Google Maps ,Play store etc.)
Unique PhoeniX bootanimation & shutdown animation - Huge thank to the artist anbech
Mods:
- Call Recorder
- Hacked Stock Email App
- Sysro & sysrw support
- Enabled touchwiz wallpaper scrolling
- Disabled scrolling cache
- Phone with no increasing ringtone
- All supported languages enabled
- All supported languages for Samsung Keyboard enabled
- Enabled init.d scripts
- Shutter Sound menu Enabled to stock camera
- Big APN list
- Enable sub Symbols on Stock Samsung keyboard
- Added exit menu to stock web browser
- Dialer search matches numbers in contacts and call logs along with contacts
- data/app enabled
- NFC Hack - You can use your NFC while the screen is off, and at lockscreen.
- 4 ways to reboot menu - Extended power menu
- Enable call button in contact list
- Disabled Converting Effect Between SMS MMS
- Automatic SMS encoding (Arabic and other utf-8 encoding support)
- Automatic efs backup when flashing the rom.
- Added ES File Explorer.
- Ported alot of Note 3 Features! This is the first ROM of S4 with that!!:
- Note 3 Launcher With PullUp App Chooser (Can be changed in PhoeniX Extra!)
- Note 3 My Magazine
- Note 3 Multiwindow with the following features:
* Quad screen: you can split multiwindow up to 4 different apps!
* Floating windows: Like Pen Window, just with the finger(single click on the app will open popup window)
* Note 3 Drag & Drop Multiwindow feature
* Abillity to open same app from this list(If you need any more app please make a list so I can add in the next release) :- New Note 3 Lockscreen effect - Watercolor effect! Now you have 3 options:Code:com.sec.chaton com.sec.android.app.myfiles com.google.android.talk com.google.android.youtube com.infraware.polarisviewer4 com.infraware.polarisoffice4 com.whatsapp com.kakao.talk com.sec.android.app.sbrowser com.android.email com.android.mms com.android.chrome com.facebook.katana com.google.android.gm com.google.android.videos com.twitter.android com.quoord.tapatalkpro.activity com.sec.android.app.videoplayer com.estrongs.android.pop
* Watercolor Effect
* Ripple Effect
* Flare Effect
- New Settings Option - From now you have Search option in settings!! Exactly like in the Note 3!
- Note 3 Phone with Popup Incoming Call Notifications! - MultiWindow Manager New Edition - thanks to BJB, Inc.
- Added Official OmegaDroid Android News app - I am reporter and editor there, so if you want to read the best news about android, use this!
- Added TB Restore Fixer Stub by -viperboy- his thread
- LMT Launcher that offers a pie control like nexus, and gestures. Thanks to noname81 his thread.
- Exclusive! Only to PhoeniX ROM!:
* RTL Menus when you select Arabic/Hebrew as your default language.
* New Amazing Wallpapers in Wallpaper Chooser Wallpapers! Beautiful Wallpapers! How to use? Click on Menu-> Set Wallpaper-> Home/Lock/Both-> Wallpaper Picker/chooser-> Select your Wallpaper!
* New Settings app: Huge thank to ficeto! - PhoeniX Settings App includes the following features:Samsung Secret CodesFast DormancyFaster Fix GPSCSC SelectCPU Spy PlusBattery ChooserTerminal EmulatorXposed +ModulesIdle Wifi Time ManagerLogcatOS MonitorPhoeniX OTA Center - now you can update the rom without plugin into the computer!
The downloads will be save on the internel SD card(if you use my memory script so it will be saved in the externel sd card) undr the folder OTA updates.
Reboot options - Normal, Recovery, Download.
Xposed support. Huge thanks to rovo89 his thread.
Xposed Modules:
Wanam Xposed - Special thanks to wanam his thread
Nottach Xposed - Special thanks to Nottach his thread
DPI Settings - thanks to rovo89
|
How To UnBrick Samsung Galaxy S 4g (Only for T959v) Guide

This Guide also is applicable when your phone is not going to custom recovery
FiX Information:
Mod Type:: ROM
Difficulty:: Easy
Mod Base:: TouchWiz (Samsung)
Mod Status:: Stable
Apply In:: ODIN/Heimdall
Carrier:: T-Mobile
Optional:: Includes Recovery
Requires Root:: No
Android Version:: 2.3.X (GB)
Source::
Another Team Acid release
NOTES
* The KC1 and KJ6 files contain bootloaders for the SGH-T959V. By downloading and flashing the files you agree that you will not hold me or anyone in Team Acid responsible if your device gets bricked. There are always risks when flashing custom firmware and ROMs onto your phone.
* As always, make a full backup of your SD card and phone.
FEATURES
* Root
* CWM + drhonk's custom KJ1 kernel preinstalled.
* Gets rid of the disappearing apps problem
* Gets rid of the missing SD card once you're booted into GB
* Gets rid of your bootloops
* Get a working GB ROM with ext4 support (includes Official KJ6 with drhonk's custom KJ1 + cwm kernel)
* All the files you need are included in this post
* Wipes out all the gremlins you had on your phone by putting the KC1 bootloaders, then the KJ6 bootloaders on your phone.
PREREQUISITES
1) Download all the files from the links on this post, and extract both .7z files and Odin v1.85 using 7-zip or a compatible program
2) Leave the phone's back cover off since you're gonna have to do a few battery pulls and you need access to the sd card
3) Format your sd card by hooking it up to your computer with an sd adapter or through mass storage mode using your phone and a USB cable.
FORMATTING ERASES EVERYTHING ON YOUR SD CARD. MAKE SURE YOU BACK IT UP ONTO YOUR COMPUTER BEFORE YOU DO THIS.
Follow this guide to format your sd card on Windows (this is on XP but the same steps can be taken on Vista or 7).
This guide is meant for using your sd card on a Wii, but the process is the same to get it working on the phone.
WATCH THE VIDEO ALL THE WAY TROUGH BEFORE ATTEMPTING ANY OF THIS.
INSTRUCTIONS
1) After formatting the SD card with the steps above, put your favorite GB ROM, and install_busybox.zip onto the SD card
- 1a) You can restore any backup of your SD card you made at this point. Make sure you have at least 2GB free on the card though!
2) Put your phone into download mode for guide to how to put your phone in download mode Click here
3) Open Odin on your computer
4) Load up Odin, and load the KC1 files, DON'T TOUCH ANY OTHER OPTIONS, leave them like they are even if Odin changes them!
- 4a) PIT: Sgs4g.pit
- 4b) PDA: pda.tar.md5
5) Flash and let the phone reboot. Once you see the T-Mo startup screen (the pink one), OR the CWM (red text) screen do a battery pull.
6) Put your phone back into download mode
7) Click reset in Odin, now load up the KJ6 files
- 7a) PDA: pda.tar.md5
- 7b) CSC: csc.tar.md5
8) Flash the files and let the phone reboot.
- 8a) The phone will go into standard recovery (blue and yellow letters, you might hear Linda) and then reboot itself once.
- 8b) The 2nd time you will see either the CWM red letter screen or the Galaxy S 4G white letters/pink splash screen and if you prefer you can let the phone boot all the way, do a battery pull.
9) Now unplug the USB cable, put the battery back in, hold vol + and -, then press power. You should boot into CWM (red letters, voodoo).
10) Go into the voodoo menu > enable lagfix and /system lagfix on
11) Flash the GB rom you put on your sd card
12) Flash the busybox_installer.zip
13) Reboot and hear Linda give her speech.
14) Welcome to GB with ext4!
Download Links:
7-zip
Odin 3 1.85
Install_busybox
fb_kc1_bootloaders_cwm.7z
fb_kj6_official_kj1_kernel.7z
CREDITS:
Team Acid
Rameez Uddin


